Converting P2V and V2V Using VMware Standalone Converter for Migration of Physical and Virtual Machines onto VMware
4/15/2016
Introduction
Server virtualization became the standard approach for enterprise data centers due to improved hardware utilization, simplified management, disaster recovery capabilities, and reduced operational costs.
Organizations running standalone physical servers or workloads hosted on other virtualization platforms often needed a reliable method to migrate them into a VMware vSphere infrastructure.
VMware Standalone Converter provides a practical solution for both:
- Physical-to-Virtual (P2V) migration
- Virtual-to-Virtual (V2V) migration
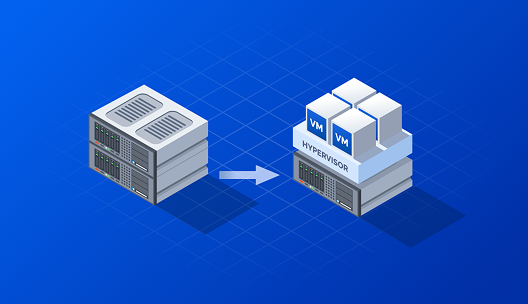
Unlike backup and restore methods, VMware Standalone Converter performs direct machine conversion while preserving the operating system, applications, configurations, user profiles, and most system settings.
This article demonstrates how experienced administrators can plan, execute, troubleshoot, and validate successful migrations using VMware Standalone Converter in a production environment.
Understanding P2V and V2V Migration
Physical-to-Virtual (P2V)
P2V converts an existing physical server into a VMware virtual machine.
Typical examples include:
- Windows Server 2003
- Windows Server 2008
- Windows Server 2012
- Linux servers
- Legacy application servers
- File servers
Instead of rebuilding the operating system, the converter copies:
- Operating System
- Installed applications
- Registry
- System configuration
- Disk partitions
- User data
The result is a bootable VMware virtual machine identical to the original physical server.
Virtual-to-Virtual (V2V)
V2V converts virtual machines from one virtualization platform to another.
Common scenarios include:
- VMware Workstation → ESXi
- Hyper-V → VMware
- Microsoft Virtual PC → VMware
- VMware Server → ESXi
This approach eliminates the need to rebuild servers manually.
Why Organizations Perform Migrations
Typical reasons include:
- Data center consolidation
- Hardware refresh
- Storage migration
- Disaster recovery preparation
- Migration to private cloud
- Server lifecycle replacement
- Improved backup strategy
- Better resource utilization
Planning the Migration
Successful migrations begin with preparation.
Step 1 – Inventory the Server
| Item | Example |
|---|---|
| Hostname | APP01 |
| IP Address | 192.168.1.25 |
| Operating System | Windows Server 2008 R2 |
| CPU | 4 Core |
| RAM | 8 GB |
| Disk Size | 320 GB |
| Services Running | SQL Server, IIS |
Step 2 – Verify VMware Compatibility
Verify the following:
- Supported operating system
- Supported file system
- ESXi version
- vCenter compatibility
- VMware Converter version
Unsupported operating systems may require manual migration.
Step 3 – Verify Disk Health
Windows
chkdsk /fLinux
fsckRepairing disk errors before migration significantly reduces conversion failures.
Step 4 – Verify Available Storage
Ensure the destination datastore has sufficient free capacity.
Recommended capacity:
- 120% to 150% of the source disk usage
Step 5 – Backup
Never perform a production migration without:
- Full system backup
- Virtual machine snapshot (if applicable)
- Database backup
- Rollback plan
Step 6 – Plan Downtime
Applications with active databases should be migrated during scheduled maintenance windows.
Although hot cloning is supported, planned downtime provides better consistency for business-critical workloads.
VMware Standalone Converter Architecture
+----------------------+
| Source Machine       |
| Physical / Virtual   |
+----------+-----------+
           |
           |
   Converter Agent
           |
           |
+----------------------+
| Converter Server     |
+----------+-----------+
           |
           |
   Network Transfer
           |
           |
+----------------------+
| ESXi Host            |
| VMFS Datastore       |
+----------------------+
Components
Converter Client
Used for:
- Creating conversion jobs
- Monitoring migration progress
- Reviewing conversion logs
Converter Server
Responsible for:
- Authentication
- Job management
- Coordinating conversion tasks
Converter Worker
Responsible for:
- Reading source disks
- Copying data
- Creating VMware virtual disks
Destination
Typical destination:
- VMware ESXi
- VMware vCenter
Supported storage includes:
- VMFS
- SAN
- NAS
Network Considerations
Ensure all required firewall ports are open between:
- Source machine
- Converter server
- ESXi host
- vCenter Server
Firewall restrictions remain one of the most common causes of migration failures.
Performing a Physical-to-Virtual (P2V) Migration
Step 1 – Install VMware Standalone Converter
Install the converter on:
- Administrator workstation
- Management server
Avoid installing it directly on busy production servers.
Step 2 – Launch the Converter
Select:
Convert MachineStep 3 – Select the Source Machine
Choose:
Powered-on MachineSpecify:
- Local Computer
- Remote Computer
Enter administrator credentials.
Step 4 – Select the Destination
Destination Type
VMware Infrastructure Virtual MachineProvide:
- ESXi hostname
- vCenter hostname
- Username
- Password
Step 5 – Configure the Virtual Machine
Specify:
- Virtual machine name
- Datastore
- ESXi host
- Resource pool
Step 6 – Configure Virtual Hardware
Adjust:
- vCPU count
- Memory
- Network adapters
Example:
Physical Server
8 CPUVirtual Machine
4 vCPUMemory
16 GBAssign the correct production VLAN or test network.
Step 7 – Configure Disks
Available options:
- Copy all disks
- Resize partitions
- Thin Provision
- Thick Provision
Reduce oversized partitions whenever possible to shorten migration time.
Step 8 – Synchronization
For production workloads, perform synchronization before final cutover.
Benefits include:
- Reduced downtime
- Latest data copied
- Faster final migration
Step 9 – Start Conversion
Monitor:
- Progress percentage
- Current task
- Estimated completion time
- Transfer speed
Step 10 – Validate
Before retiring the physical server, verify:
- Successful login
- Windows/Linux services
- Applications
- Database connectivity
- Network communication
- Scheduled tasks
Performing a Virtual-to-Virtual (V2V) Migration
Supported source platforms include:
- VMware Workstation
- VMware Server
- Microsoft Hyper-V
- Microsoft Virtual PC
Select:
Powered-on Machineor
VMware Virtual MachineEnter source credentials.
Select the destination ESXi host.
Configure:
- CPU
- Memory
- Storage
- Network
Start the conversion.
Hardware Changes
VMware Converter automatically replaces incompatible virtual hardware.
Example:
Old Virtual NIC
↓
VMXNET
IDE Controller
↓
LSI Logic SCSI
Legacy drivers are removed or disabled during the conversion.
Install VMware Tools
After the first successful boot, install VMware Tools.
Benefits include:
- Better storage performance
- Improved network drivers
- Mouse synchronization
- Time synchronization
- Graceful shutdown
Performance Optimization and Best Practices
Use High-Speed Networking
Avoid:
- 100 Mbps links
Prefer:
- 1 Gbps
- 10 Gbps
Higher bandwidth dramatically reduces migration time.
Reduce Disk Usage
Delete unnecessary files such as:
- Temporary files
- Log files
- ISO images
- Old backups
Smaller disks migrate faster.
Defragment Windows Servers
Run:
Disk DefragmenterThis improves sequential disk reads during migration.
Disable Antivirus
Temporarily disable real-time antivirus scanning if organizational policies allow.
This minimizes disk read delays.
Hot Clone vs Cold Clone
| Hot Clone | Cold Clone |
|---|---|
| No downtime | Planned downtime |
| Online migration | Consistent disk state |
| Faster cutover | Best for databases and domain controllers |
Schedule During Maintenance Windows
Large migrations consume:
- CPU
- Network bandwidth
- Storage bandwidth
Perform migrations during:
- Nights
- Weekends
- Planned maintenance windows
Thin Provisioning
Advantages:
- Saves datastore capacity
- Faster deployments
- Better storage utilization
Ideal for development and test environments.
Troubleshooting Common Conversion Failures
| Problem | Cause | Resolution |
|---|---|---|
| Authentication failed | Incorrect credentials | Verify administrator account |
| Unable to contact source | Firewall or network | Verify connectivity and firewall rules |
| Conversion stops | Antivirus interference | Temporarily disable antivirus |
| Disk read errors | File system corruption | Run chkdsk or fsck |
| Datastore full | Insufficient storage | Free space or select another datastore |
| Blue screen after migration | Driver mismatch | Repair storage drivers |
| Missing network adapter | Hardware changes | Install VMware Tools |
Review Converter Logs
Check logs for:
- Authentication failures
- Disk copy failures
- Snapshot errors
- Driver injection failures
- Network interruptions
Always resolve the root cause before restarting the migration.
Practical Troubleshooting Workflow
- Verify source server health.
- Confirm network connectivity.
- Verify firewall rules.
- Check datastore capacity.
- Review Converter logs.
- Resolve the identified issue.
- Retry the conversion.
- Validate the migrated virtual machine.
Post-Migration Validation
Migration is complete only after successful validation.
Verify:
- Operating system boots correctly
- Applications function normally
- Services start automatically
- Users can access applications
- Scheduled tasks execute
- Shared folders are available
Verify Network Configuration
Confirm:
- IP address
- DNS settings
- Default gateway
- VLAN assignment
- Firewall rules
Remove hidden physical NICs to avoid network conflicts.
Install VMware Tools
VMware Tools provides:
- Optimized drivers
- Better performance
- Time synchronization
- Graceful shutdown
- Improved virtual hardware support
Remove Legacy Hardware Components
Remove:
- Vendor hardware agents
- RAID utilities
- Physical NIC drivers
- Obsolete monitoring software
Update Backup and Monitoring
After migration:
- Add the VM to backup jobs
- Update monitoring systems
- Verify alerts
- Test recovery procedures
Performance Benchmarking
Compare against the original server by measuring:
- CPU utilization
- Memory usage
- Disk latency
- Network throughput
- Application response time
Adjust virtual resources if required.
Decommission the Physical Server
Only retire the original server after:
- User acceptance testing
- Backup validation
- Stable production operation
- Documentation updates
- Formal migration sign-off
Maintain a rollback plan until the migration is officially complete.
Conclusion
VMware Standalone Converter remains one of the most effective tools for migrating physical and virtual workloads into VMware environments. By preserving operating systems, applications, and configurations, it eliminates the need to rebuild servers manually and significantly reduces migration effort.
Successful migrations depend on careful planning, infrastructure readiness, thorough validation, and a disciplined rollback strategy. Administrators who inventory systems, verify compatibility, optimize storage and network performance, and validate workloads after conversion can consistently deliver reliable P2V and V2V migrations with minimal downtime.
When combined with established operational practices, VMware Standalone Converter enables organizations to modernize legacy infrastructure, consolidate workloads, and transition to a fully virtualized data center while minimizing operational risk.